Keeping your ice maker clean is essential. A clean machine ensures fresh and safe ice.
It also extends the life of your appliance. Ice makers can collect dirt, mold, and bacteria over time. Regular cleaning helps prevent these issues. It also improves the taste and quality of your ice. In this guide, you will learn how to clean your ice maker effectively.
We’ll cover simple steps and tips to make the process easy. By following these steps, you can keep your ice maker in top condition. Clean ice means better drinks and a healthier home. Let’s dive into the cleaning process and ensure your ice maker stays in great shape.
Preparation
Cleaning an ice maker machine starts with proper preparation. This step ensures everything is in place for a smooth cleaning process. Begin by gathering necessary supplies and turning off the machine.
Gather Supplies
First, collect all required cleaning materials. You will need a soft cloth, mild detergent, and warm water. Have a small brush for hard-to-reach areas. A bucket or large container helps catch excess water. Ensure you have rubber gloves to protect your hands.
Turn Off And Unplug
Safety is a priority. Turn off the ice maker machine. Find the power switch and flip it to the off position. Then unplug the machine from the wall socket. This prevents any electrical hazards during cleaning.
Credit: www.youtube.com
Empty Ice Bin
Cleaning an ice maker machine starts with emptying the ice bin. Remove all ice to access the interior.
When it comes to maintaining your ice maker machine, the first crucial step is to empty the ice bin. Ensuring your ice bin is clear not only helps with the cleaning process but also guarantees the production of fresh, clean ice. Let’s dive into the details on how to effectively empty your ice bin.
Remove Ice
First, open the ice maker and carefully remove the ice bin. Use both hands to avoid any spills. Take your time to ensure you don’t drop any ice on the floor. Once the bin is out, gently shake it to loosen any ice stuck to the sides. This will make it easier to empty completely. If you find any stubborn pieces, use a plastic utensil to dislodge them—avoid metal tools as they can damage the bin.
Dispose Properly
Now that you have the ice, think about the best way to dispose of it. If the ice is clean and fresh, you can use it in drinks or to cool down food. However, if the ice has been sitting for a while, it’s best to let it melt in a sink. Dumping it directly into the sink is quick and prevents any unnecessary mess. Consider collecting the melted water for plants or cleaning. It’s an eco-friendly way to repurpose what would otherwise go to waste. Have you ever wondered how these small actions impact your overall machine maintenance? Emptying and cleaning your ice bin regularly can prolong the life of your ice maker and improve its efficiency. Plus, it ensures that every cube of ice you use is as fresh as possible. So next time you think about cleaning your ice maker, remember the importance of starting with an empty bin.
Disassemble Parts
Cleaning your ice maker machine thoroughly requires disassembling some parts. This ensures you can reach hidden dirt and grime. Follow these steps to make the process easy and effective.
Remove Trays
First, remove the trays from your ice maker. Pull them out gently to avoid any damage. Check for any ice or debris stuck in the trays. Clean them with warm, soapy water. Rinse well and dry completely before reassembling.
Detach Filters
Next, detach the filters from the machine. Locate the filter compartment, usually at the back or bottom. Carefully remove the filters and inspect them for dirt or blockages. Clean them with a soft brush or replace if necessary. Properly maintained filters ensure clean and fresh ice.

Credit: www.wikihow.com
Clean Interior
Cleaning the interior of your ice maker machine is crucial for ensuring it produces clean, fresh ice. Neglecting this task can lead to unpleasant odors, contamination, and even health risks. Here’s a simple guide to help you clean the interior effectively.
Wipe Surfaces
Start by unplugging your ice maker to ensure safety. Remove any ice and discard it. Use a soft cloth or sponge to wipe down all the internal surfaces.
Pay extra attention to the corners and crevices where dirt and grime tend to accumulate. It’s surprising how much buildup can hide in these spots!
Make sure you wipe down the ice bin and any removable parts. Dry them thoroughly to prevent any moisture that can harbor bacteria.
Use Cleaning Solution
Once you’ve wiped the surfaces, it’s time to use a cleaning solution. A mixture of warm water and mild dish soap works well. Alternatively, you can use a commercial ice machine cleaner for a deeper clean.
Spray the solution generously on all the internal surfaces. Don’t forget the ice mold and the water reservoir. Allow it to sit for a few minutes to break down any stubborn residue.
Scrub with a soft brush to ensure all areas are cleaned thoroughly. Rinse with clean water to remove any soap residue. This step is crucial, as leftover cleaner can affect the taste of your ice.
Have you ever found unexpected grime inside your ice maker? Regular cleaning prevents this and keeps your ice fresh. What’s your go-to method for cleaning kitchen appliances? Share your tips in the comments!
Clean Exterior
Keeping the exterior of your ice maker machine clean is essential. A clean surface not only looks good but also ensures the machine works efficiently. Regular cleaning prevents the build-up of dirt and grime. Follow these steps for a spotless exterior.
Wipe Down Machine
First, unplug the ice maker. This ensures safety while cleaning. Use a soft cloth and mild detergent. Wipe all the surfaces of the machine. Pay attention to the corners and edges. These areas can collect dust and debris. Avoid using abrasive cleaners or sponges. They can scratch the surface.
Clean Controls
The controls of your ice maker also need cleaning. Use a damp cloth to wipe them down. Make sure the cloth is not too wet. Excess moisture can damage the controls. Clean around the buttons and knobs. Dirt can accumulate in these areas. Ensure the controls are dry before plugging the machine back in.
:max_bytes(150000):strip_icc()/how-to-clean-countertop-ice-maker-7564560-step-03-68b913b7181a44e5847f6a9af7c2a2b7.jpg)
Credit: www.thespruce.com
Sanitize Components
Sanitizing the components of your ice maker machine is crucial for ensuring clean and safe ice. This process helps remove any bacteria and mold that might have accumulated. Follow these steps to properly sanitize the parts of your ice maker machine.
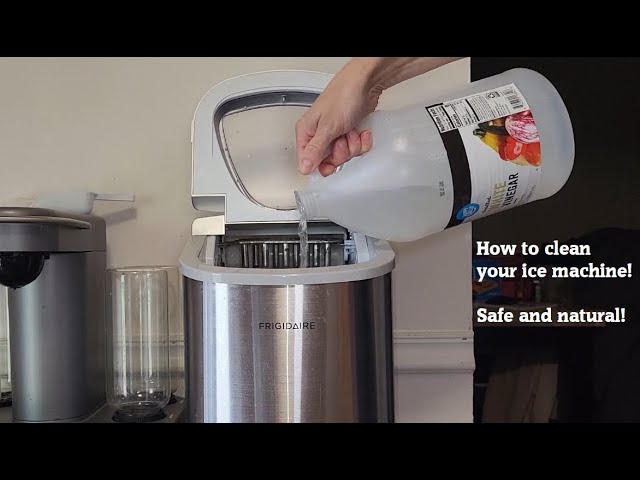
Mix Sanitizer
Prepare a sanitizing solution by mixing one part of white vinegar with three parts of water. White vinegar is effective in killing germs and is safe to use on food-contact surfaces.
Alternatively, you can use a commercial ice maker sanitizer. Follow the manufacturer’s instructions for the correct dilution ratio.
Apply To Parts
Use a soft cloth or sponge to apply the sanitizer solution to all removable parts. This includes ice trays, water reservoirs, and any other detachable components.
Make sure to thoroughly coat all surfaces. Pay special attention to areas with visible mold or residue. Leave the solution on the parts for at least 10 minutes to ensure it kills all bacteria and mold.
Rinse the parts thoroughly with clean water. This step is important to remove any remaining sanitizer residue. Allow the components to air dry completely before reassembling your ice maker machine.
Reassemble Machine
Cleaning your ice maker machine is essential for fresh and safe ice. First, unplug the machine and remove all parts. Wash each part with warm, soapy water and rinse well before reassembling.
Reassembling your ice maker machine is a crucial step after cleaning it thoroughly. This ensures that all parts fit back correctly, and your machine functions efficiently. Let’s break down the steps to make the process smooth and hassle-free.
Attach Filters
Start by attaching the filters back into their designated spots. This is essential because filters play a significant role in ensuring the ice produced is clean and safe to consume. Make sure the filters are firmly secured. Any loose parts can lead to malfunction. Have you ever noticed the difference in ice quality when the filters are not properly attached? It’s usually evident.
Place Trays Back
Next, place the trays back into the machine. These trays collect the ice and need to be positioned correctly to avoid any blockages. Ensure that they slide in smoothly without any resistance. A friend once shared how she struggled with her ice maker until she realized the tray wasn’t aligned properly. It was a simple fix that made a big difference. Take a moment to double-check everything. Are the trays sitting level? This small step can prevent future issues and keep your ice maker running efficiently. By carefully reassembling your ice maker machine, you set it up for optimal performance. What small adjustments have you found helpful in maintaining your machine?
Restart And Test
Restarting and testing your ice maker machine is a crucial step to ensure it functions properly after cleaning. This process helps you identify any issues that might have been missed during the cleaning. Plus, it gives you peace of mind knowing your machine is ready to produce fresh ice again.
Plug In Machine
First things first, plug your ice maker back into the power source. Make sure the plug is secure and there’s no damage to the cord. A loose connection can prevent your machine from starting up properly.
Once plugged in, wait a moment to ensure the machine powers up. The display should light up, and you might hear the initial sounds of the machine coming to life. If it doesn’t, double-check the power source or outlet.
Run Test Cycle
Next, run a test cycle to check that everything is working smoothly. This step is essential to see if the ice maker is functioning correctly after the cleaning. Most machines have a ‘clean’ or ‘test’ button—refer to your manual if you’re unsure.
Press the button and let the cycle run. Listen for any unusual sounds, and watch for any error messages on the display. The test cycle will usually produce a small batch of ice, giving you a quick indication of the machine’s performance.
If the ice comes out clean and in the right shape, you’re good to go. If not, you might need to repeat the cleaning process or check for any underlying issues. Have you ever noticed how a small maintenance task can save you from bigger headaches later on? This is one of those times.
So, how do you feel about your ice maker now? Ready to enjoy fresh, clean ice? Take the time to restart and test properly, and you’ll thank yourself later.
Frequently Asked Questions
What Is The Best Way To Clean The Inside Of An Ice Maker?
Clean the inside of an ice maker by unplugging it, removing parts, and washing with warm soapy water. Rinse thoroughly.
Can I Run Vinegar Through My Ice Maker To Clean It?
Yes, you can run vinegar through your ice maker to clean it. Use a mixture of vinegar and water.
How Do I Get My Ice Maker To Self Clean?
To self-clean your ice maker, check the manual for instructions. Typically, it involves pressing a specific button or running a cleaning cycle. Use recommended cleaning solutions and follow steps carefully. Regularly maintain to ensure optimal performance.
How Do You Run A Clean Cycle On An Ice Machine?
To run a clean cycle on an ice machine, unplug it and remove ice. Add cleaner, follow the manufacturer’s instructions, run the cycle, and rinse thoroughly.
Conclusion
Keeping your ice maker clean ensures fresh, hygienic ice. Regular maintenance prevents mold and bacteria build-up. Follow the steps outlined for best results. Use mild cleaners and soft cloths. Rinse thoroughly to remove residue. Dry completely before use. A clean ice maker performs better and lasts longer.
Your drinks will taste better too. Remember to repeat the process periodically. Clean ice makers make happy customers. A small effort goes a long way. Enjoy fresh, clean ice every time!
